Written by Neil I. Bettison and 3D Tudor, creator of Blender courses, Geometry Nodes tools, environment art packs, and Blender-to-Unreal workflows.
Back to Deep Dives
by 3D Tudor
How to Create Palm Trees in Blender with Geometry Nodes
A practical 3D Tudor guide to creating stylized palm trees with curve-driven trunks, randomized leaves, editable materials, and exposed controls.
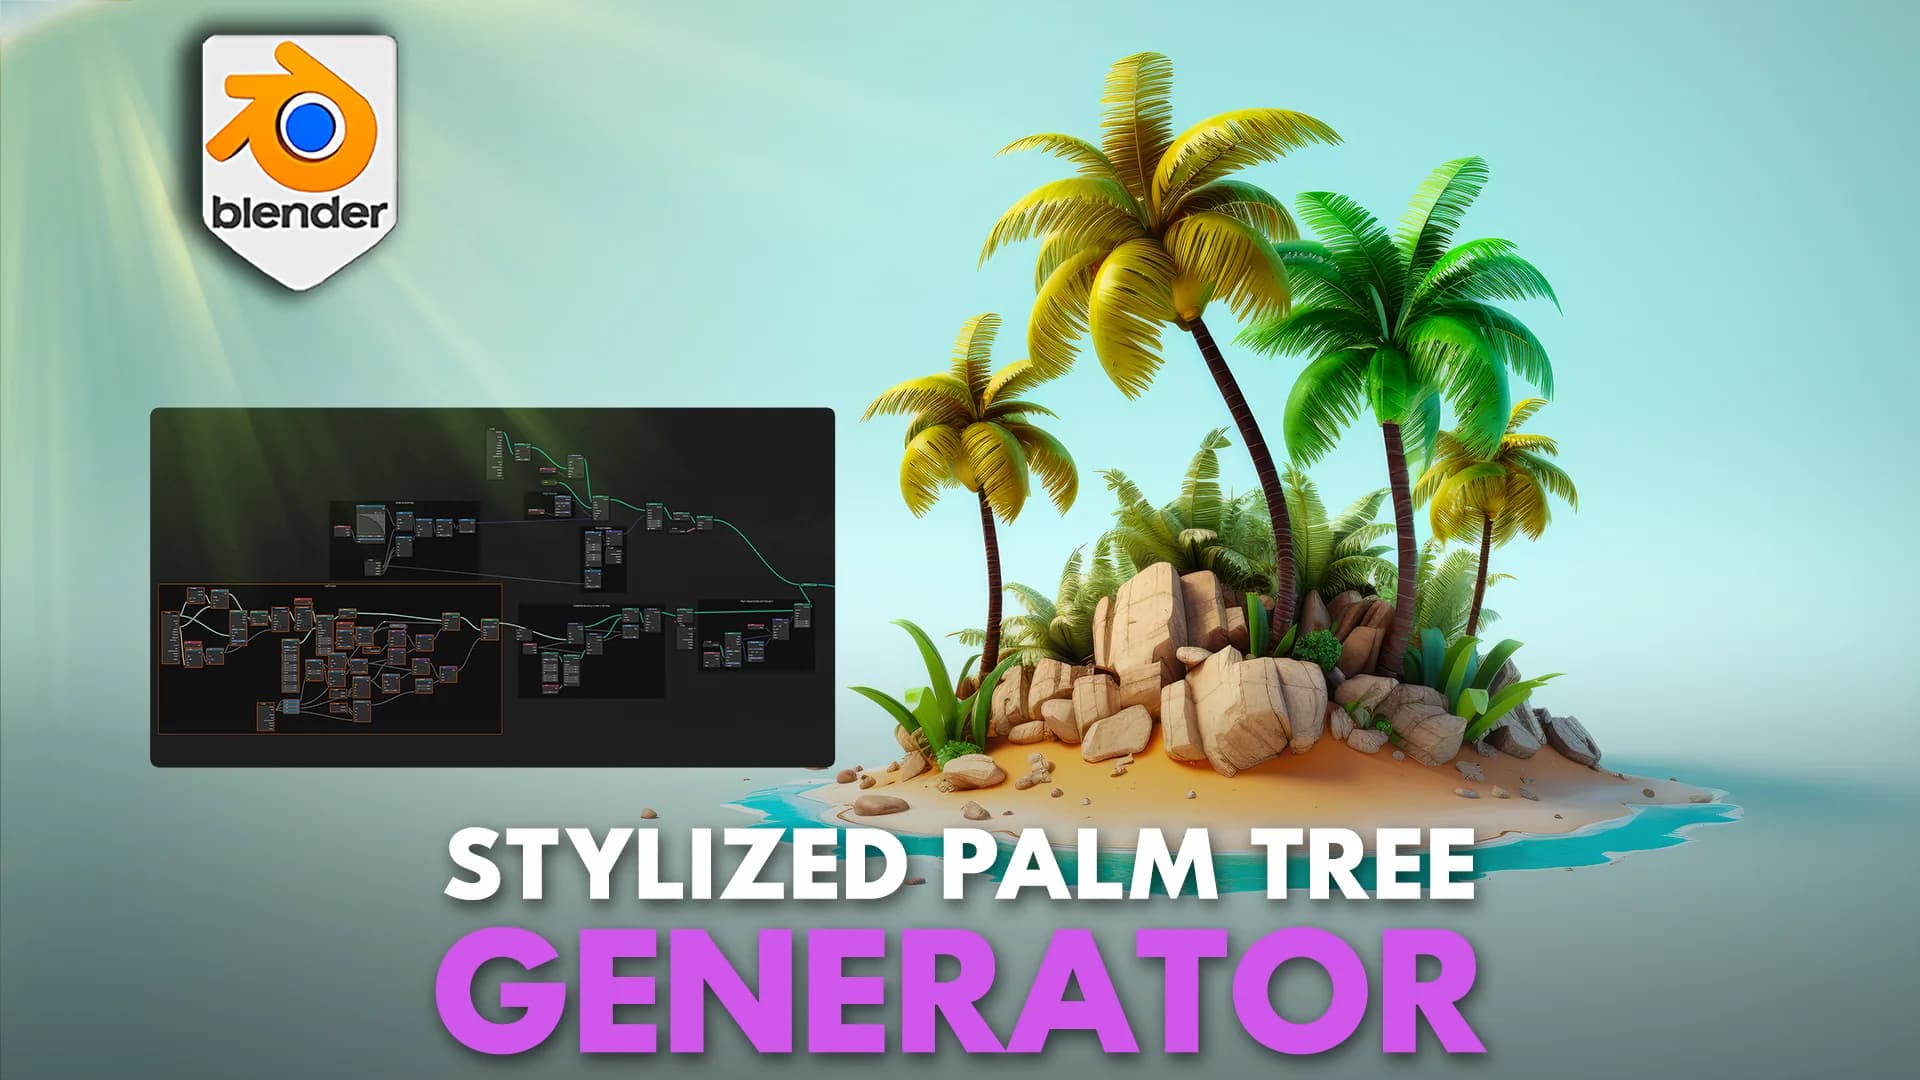
Quick answer: To create palm trees in Blender, start with a readable trunk curve, place leaf planes around the crown, vary radius and offsets, then expose the controls that change count, seed, scale, materials, and trunk size. Geometry Nodes is the better workflow when you need more than one tree because the palm stays editable after the first version.
Guide Details
This guide is written for Blender artists who need palm trees that can be adjusted for a scene, not just a single fixed island render.
The Palm Tree Blender file was checked directly, including the Palm Tree curve object, Geometry Nodes modifier, exposed leaf controls, trunk controls, and material slots.
What People Actually Need
Most searches around Blender palm trees are not asking for a single nice render. They are asking how to make the trunk read well, how to place fronds naturally, how to create variations quickly, when Geometry Nodes is worth it, and how to keep the tree useful inside a larger tropical or game-ready scene.
Old way / manual palm builds
Build Palm Trees by Hand First
These two manual clips show the idea before any procedural system is added: stack a tapered trunk, bend it with a curve, shape one palm frond, then duplicate leaves around the crown. Use the video controls for fullscreen, or open each clip larger without leaving the article.
Manual trunk method
Trunk Stack and Curve Bend
Start with one tapered trunk section, repeat it with an Array modifier, then use a curve path to bend the stacked trunk into a palm silhouette.
Open largerManual leaf method
Leaf Plane and Crown Placement
Shape a simple leaf plane, add thickness, then duplicate, rotate, and scale fronds around the crown until the tree reads clearly.
Open largerTrunk Stack Step Guide
- 1Delete the default scene objects so the palm build starts clean.
- 2Add a cylinder for the first trunk segment, move it to the floor, and keep the origin usable.
- 3Edit the cylinder so one end is smaller, then bevel and shade the segment so it catches light.
- 4Add an Array modifier on Z to stack the segment into a palm trunk.
- 5Add a Path curve, rotate it upright, and edit the curve points to create the trunk bend.
- 6Use a Curve modifier on the trunk stack so the repeated segments follow the path.
Leaf Crown Step Guide
- 1Add a sphere or crown reference point near the top of the trunk.
- 2Create a plane for the first palm leaf and edit its vertices into a long frond silhouette.
- 3Add cuts and small shape breaks so the leaf does not read as a plain flat rectangle.
- 4Use proportional editing or manual vertex movement to give the leaf a slight bend.
- 5Add Solidify so the frond has enough thickness to render cleanly.
- 6Duplicate the leaf by hand, then move, rotate, and scale copies around the crown.
Workflow proof / manual or procedural
Manual vs Procedural Palm Trees: A Simple Test
If you are deciding whether to build palm trees by hand or use Geometry Nodes, test the workflow on one small island scene before committing to a whole environment. Do not only test the first tree; test what happens when the trunk curve, crown size, leaf count, or material direction changes.
1
Initial setup
Manual palms
Fast enough for one simple palm if the trunk and leaf shape are already decided.
Geometry Nodes setup
Needs setup time, but the trunk, leaves, materials, and randomization become reusable.
2
Changing trunk shape
Manual palms
Often means editing the curve, checking the arrayed segments, and fixing the crown position.
Geometry Nodes setup
Draw or adjust the curve, then use trunk controls such as size, scale variation, and rotation seed.
3
Leaf placement
Manual palms
Fronds are duplicated, rotated, scaled, and checked by hand around the crown.
Geometry Nodes setup
Leaf count, radius, Z offset, random offset, and seed controls can create new crowns quickly.
4
Scene variation
Manual palms
Every extra tree usually becomes another manual duplicate-and-adjust pass, including material tweaks.
Geometry Nodes setup
Copy the setup to another curve and change the seed, count, scale, leaf material, or trunk material.
5
Export or final cleanup
Manual palms
Already mesh, but revisions after duplication can be expensive.
Geometry Nodes setup
Keep the palm editable while designing; convert to mesh when the tree needs painting, baking, or export.
| Test | Manual palms | Geometry Nodes setup |
|---|---|---|
| Initial setup | Fast enough for one simple palm if the trunk and leaf shape are already decided. | Needs setup time, but the trunk, leaves, materials, and randomization become reusable. |
| Changing trunk shape | Often means editing the curve, checking the arrayed segments, and fixing the crown position. | Draw or adjust the curve, then use trunk controls such as size, scale variation, and rotation seed. |
| Leaf placement | Fronds are duplicated, rotated, scaled, and checked by hand around the crown. | Leaf count, radius, Z offset, random offset, and seed controls can create new crowns quickly. |
| Scene variation | Every extra tree usually becomes another manual duplicate-and-adjust pass, including material tweaks. | Copy the setup to another curve and change the seed, count, scale, leaf material, or trunk material. |
| Export or final cleanup | Already mesh, but revisions after duplication can be expensive. | Keep the palm editable while designing; convert to mesh when the tree needs painting, baking, or export. |
For a final benchmark: record setup time, variation time, and export cleanup on the same palm using both methods. Measured results make the article stronger than generic workflow claims.
Basic nodes / procedural start
Introduction to Basic and Advanced Geometry Node Set Up
Once the manual palm makes sense, the next job is to turn the same idea into an editable system. This section keeps the roof guide layout, but swaps the GIF-style motion proof for a source-backed image slider that can be stopped, resumed, and stepped through by hand.
01Image walkthrough
Use the sliding source images as the motion stand-in here. The point is to see the palm result, the node regions, and the material logic without loading a bulky GIF.
02Basic layout
Break the system into decisions: curve input, trunk construction, leaf placement, randomness, material assignment, and clean output.
03Advanced layout
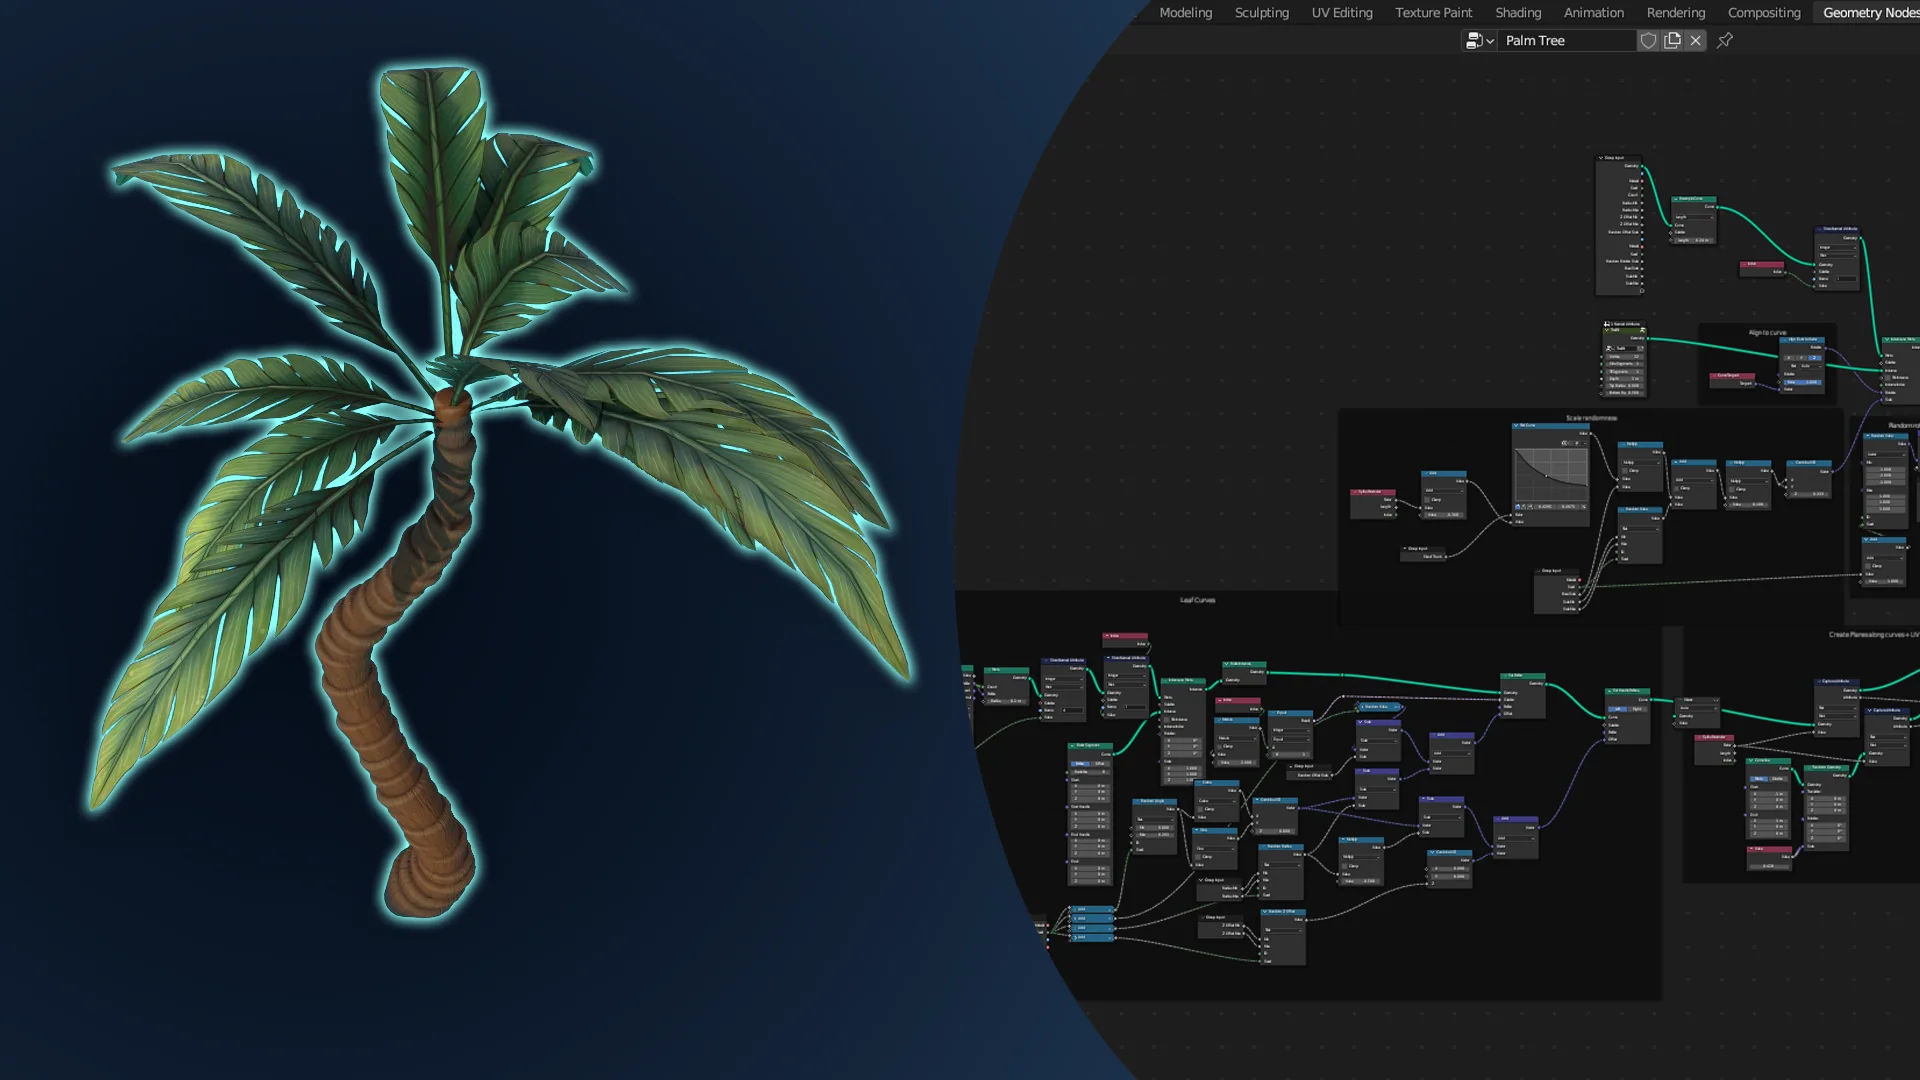
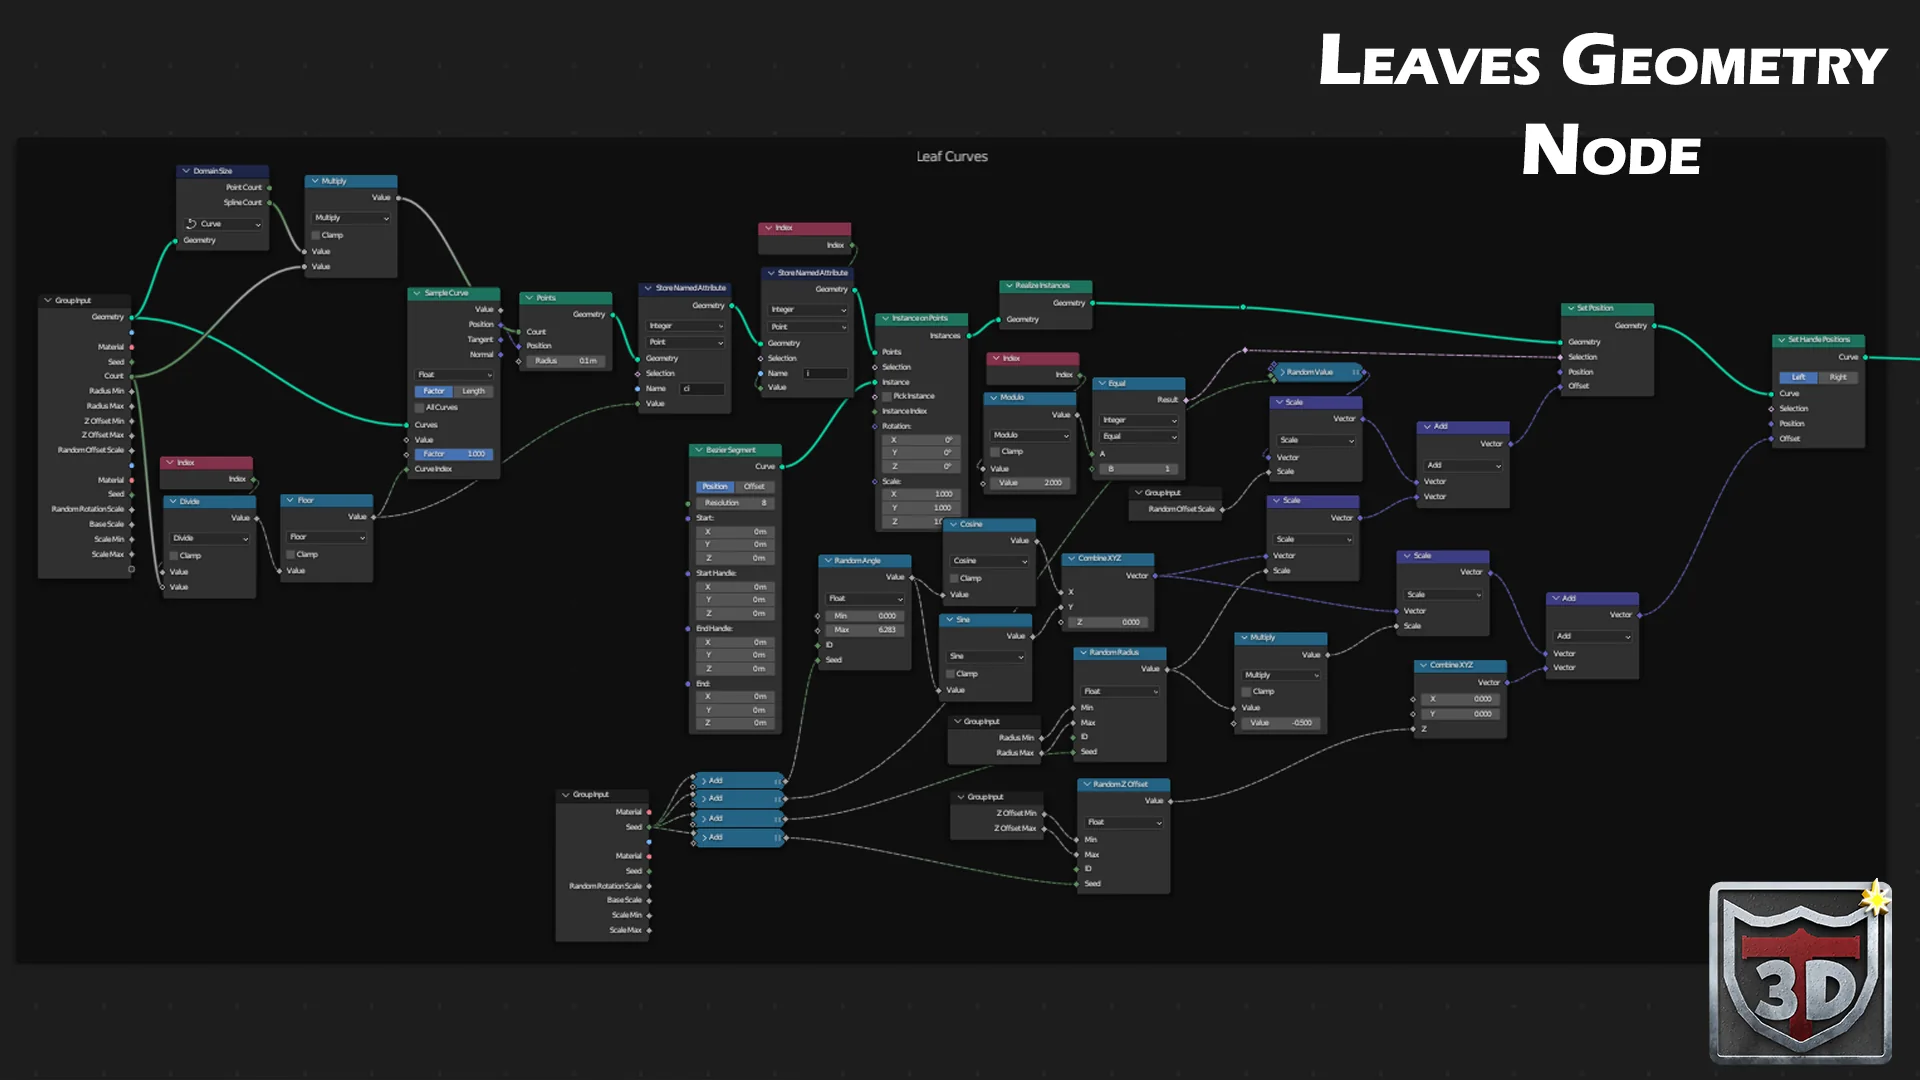
Then read the larger graph as a production map: the Palm Tree group, the TreeBit helper, leaf frames, trunk frames, materials, and exposed artist controls.
Node map
Palm result beside the node overview
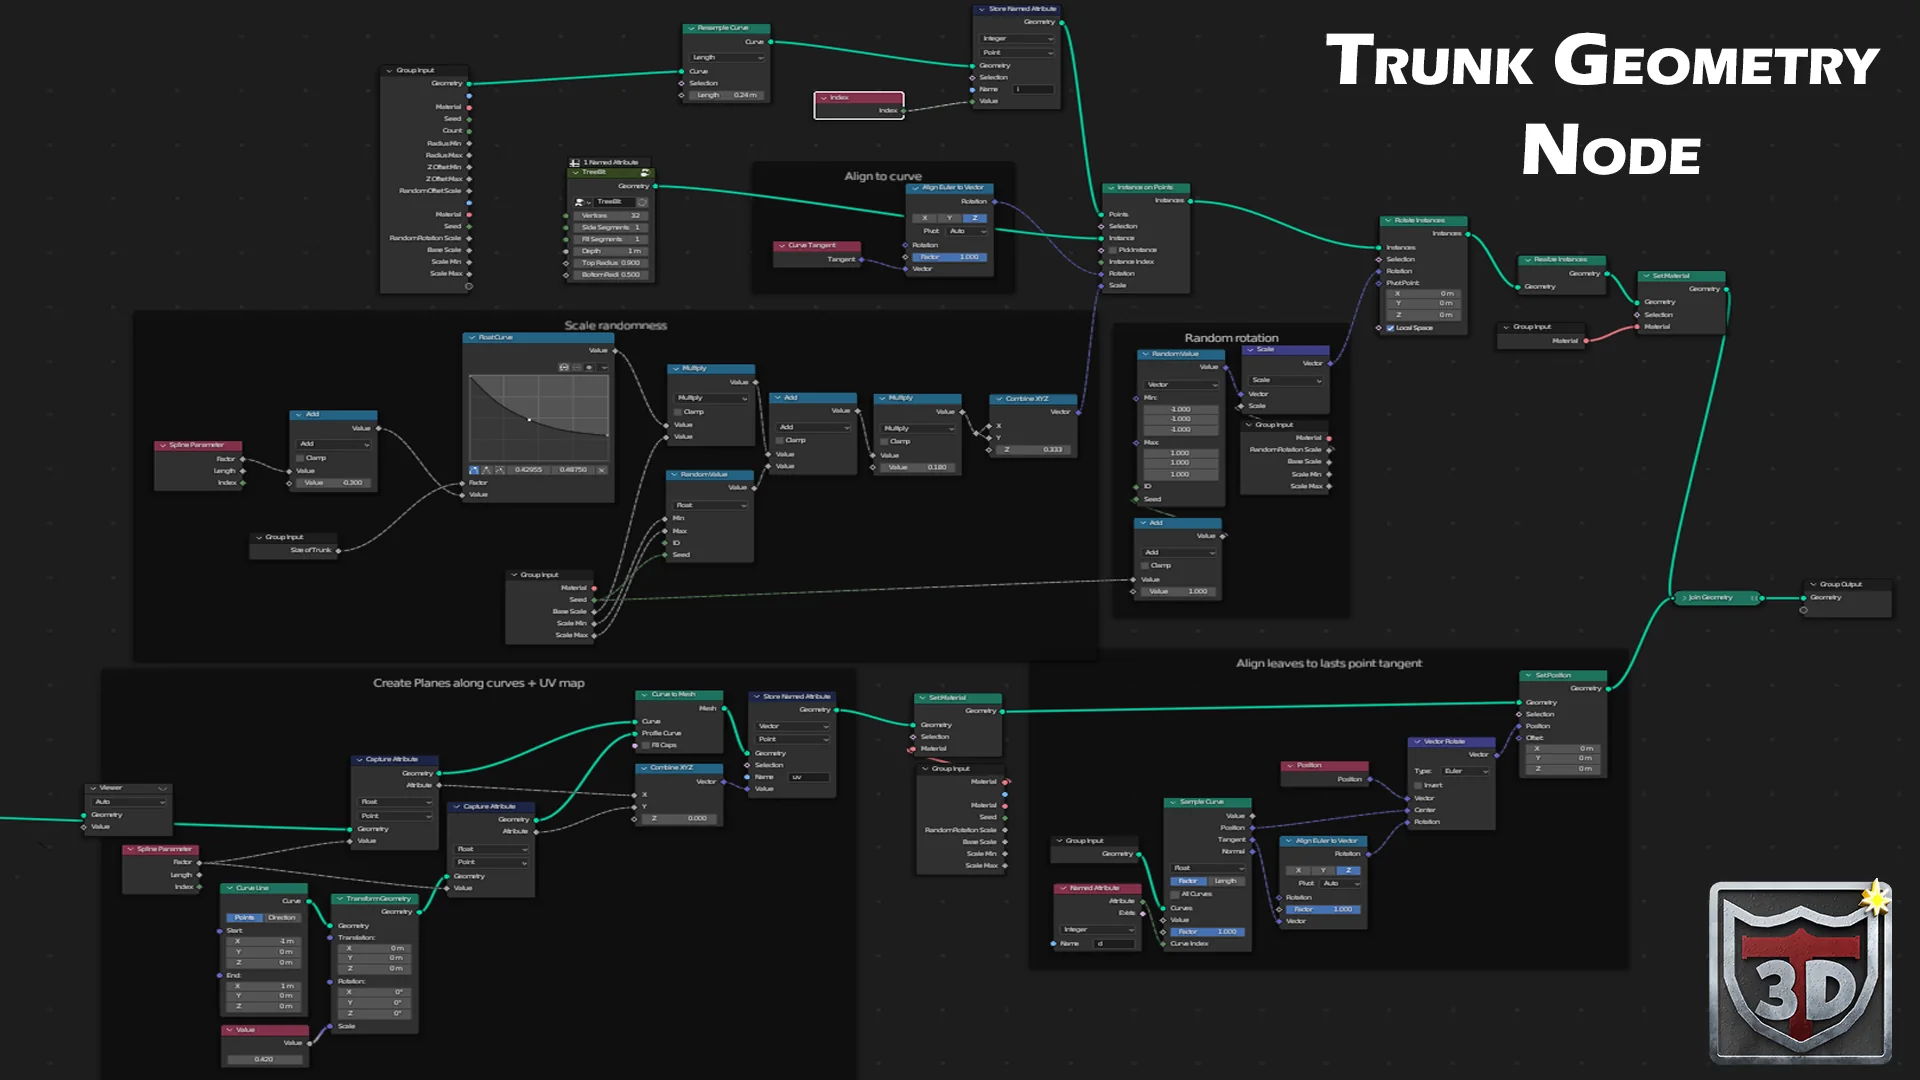
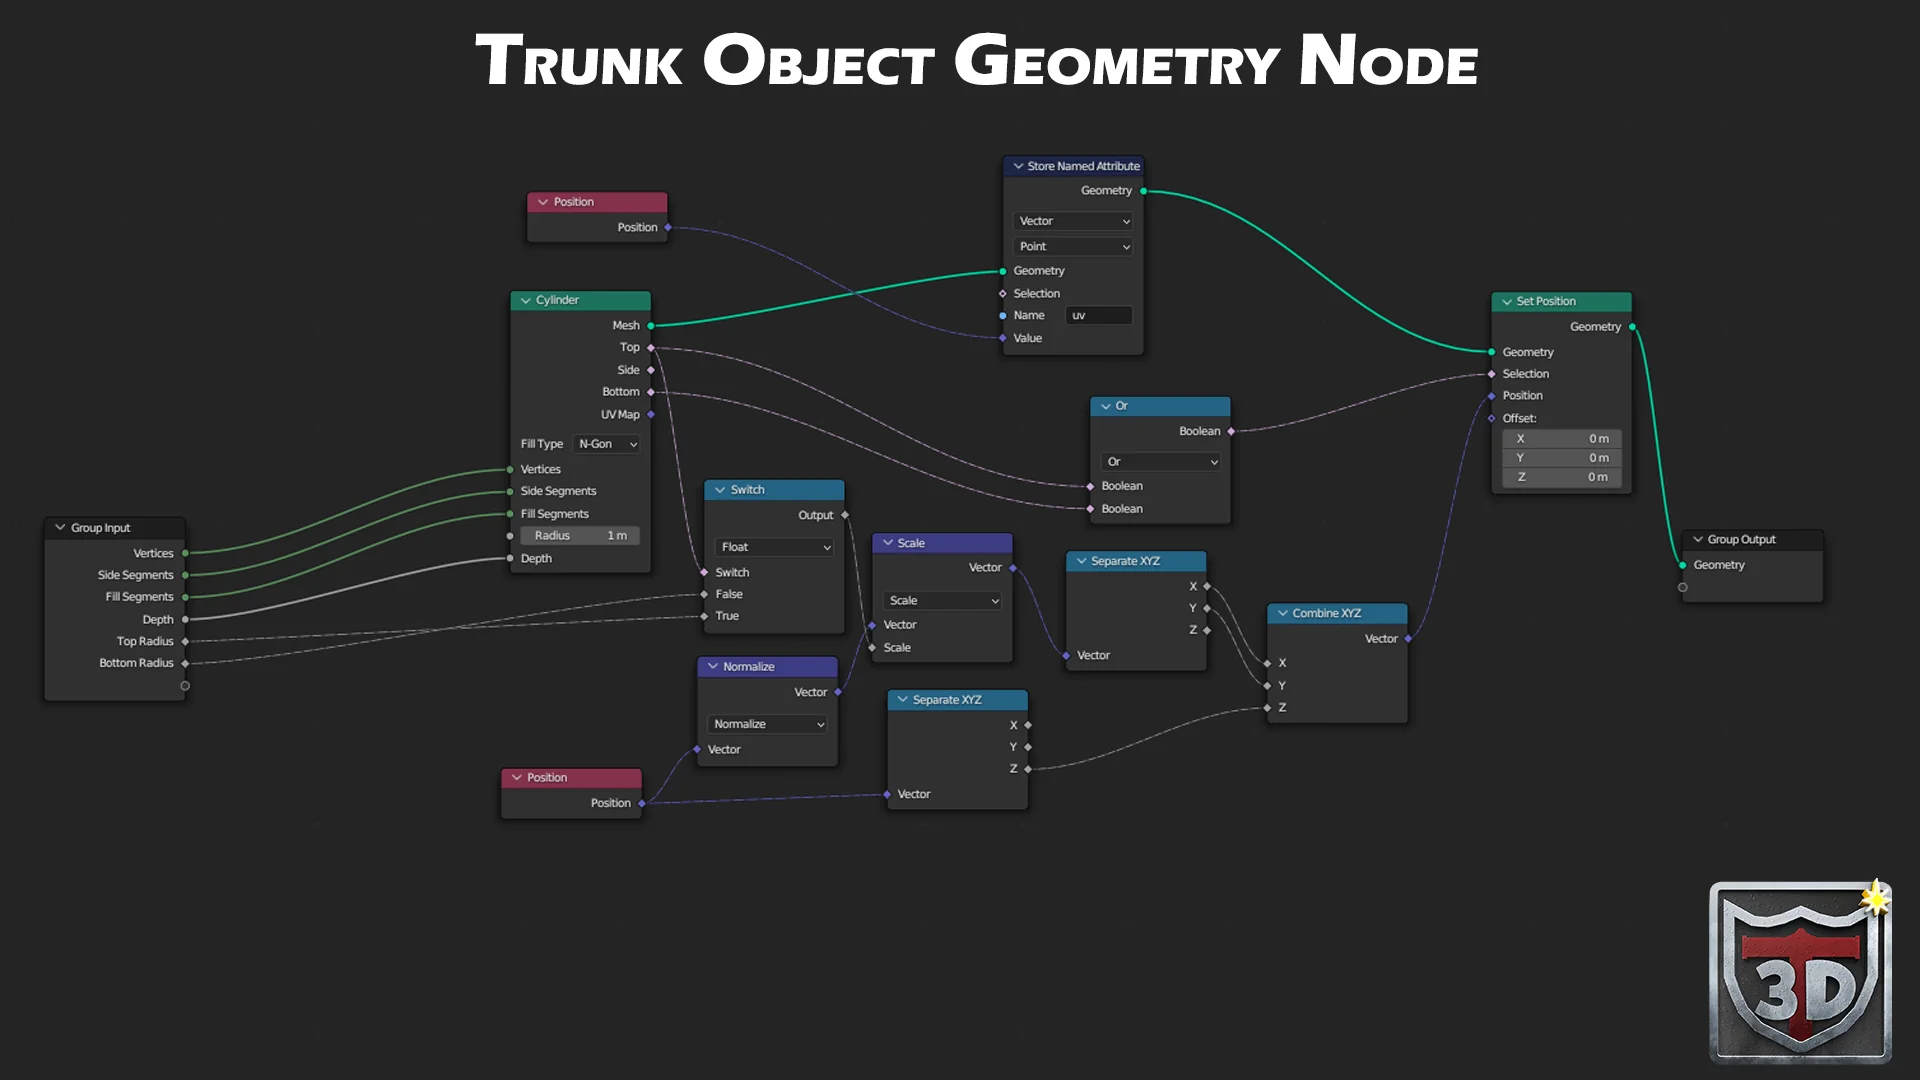
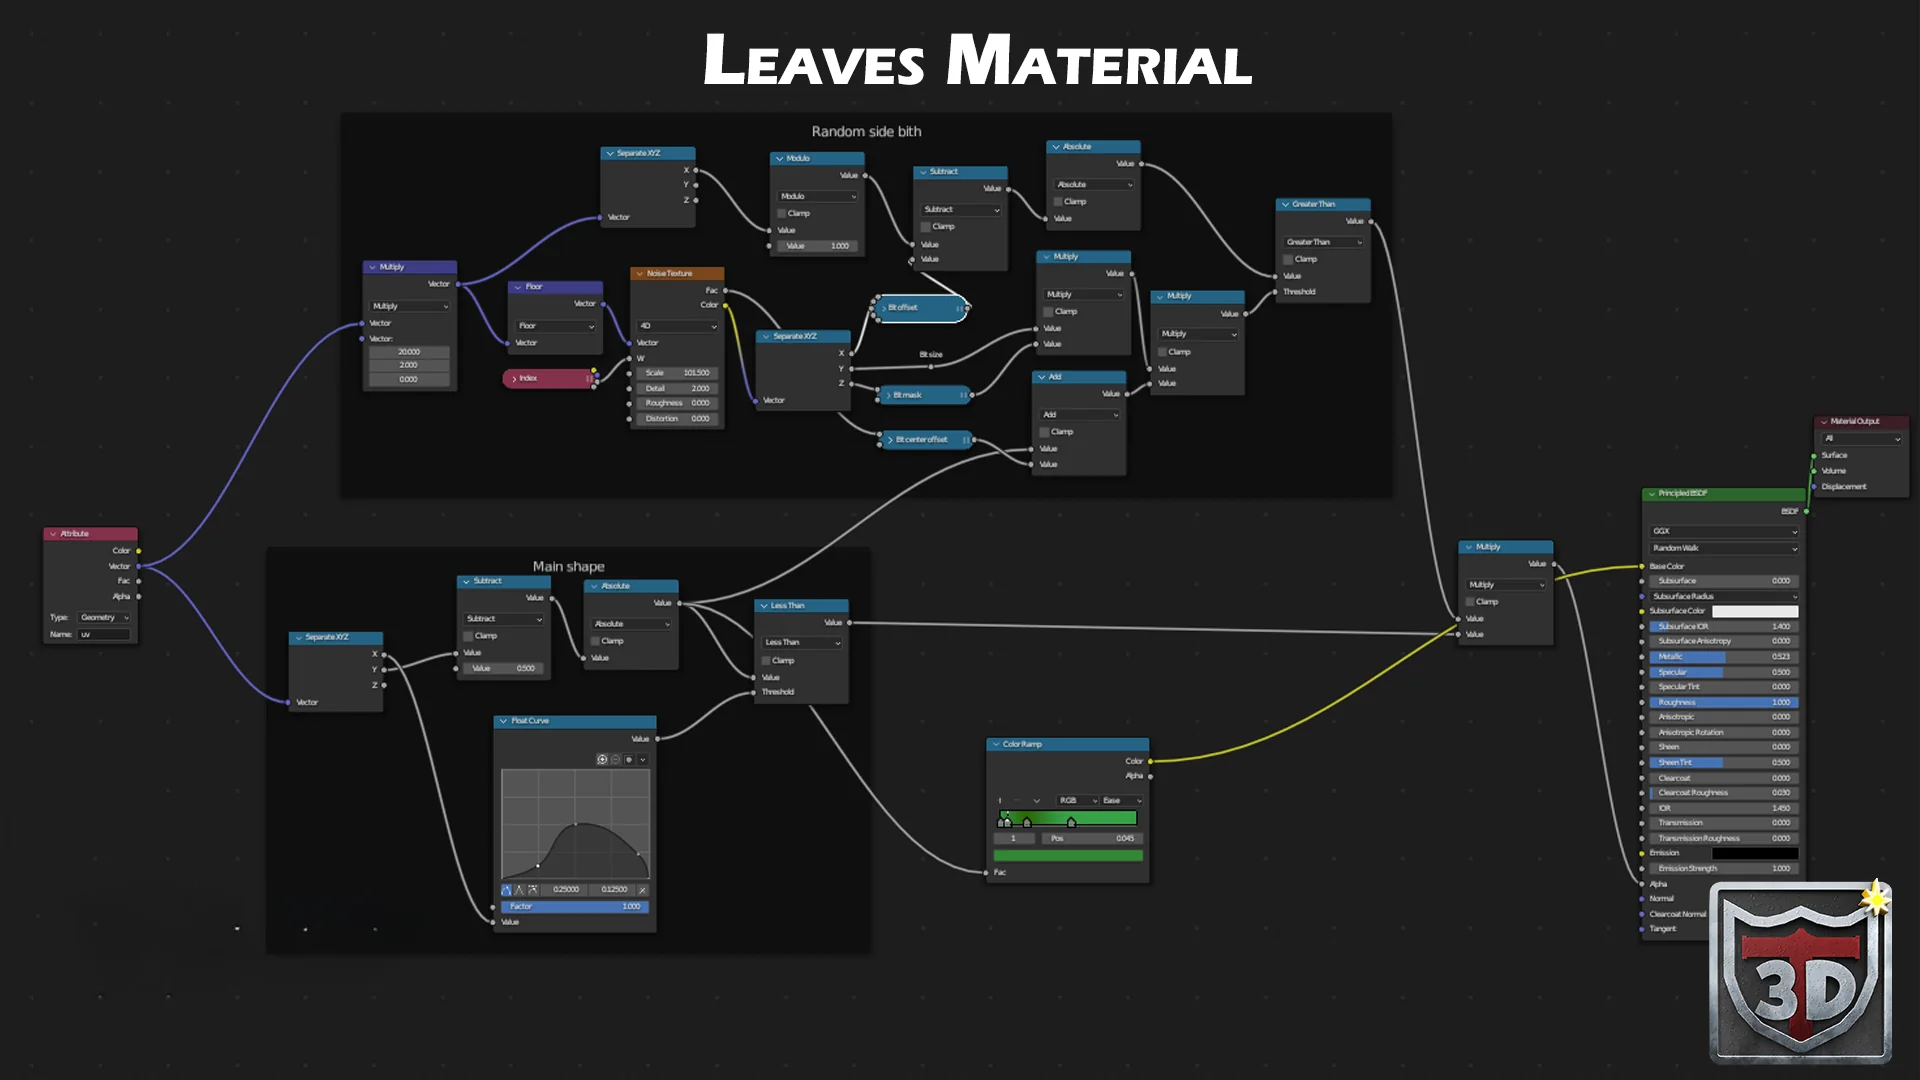
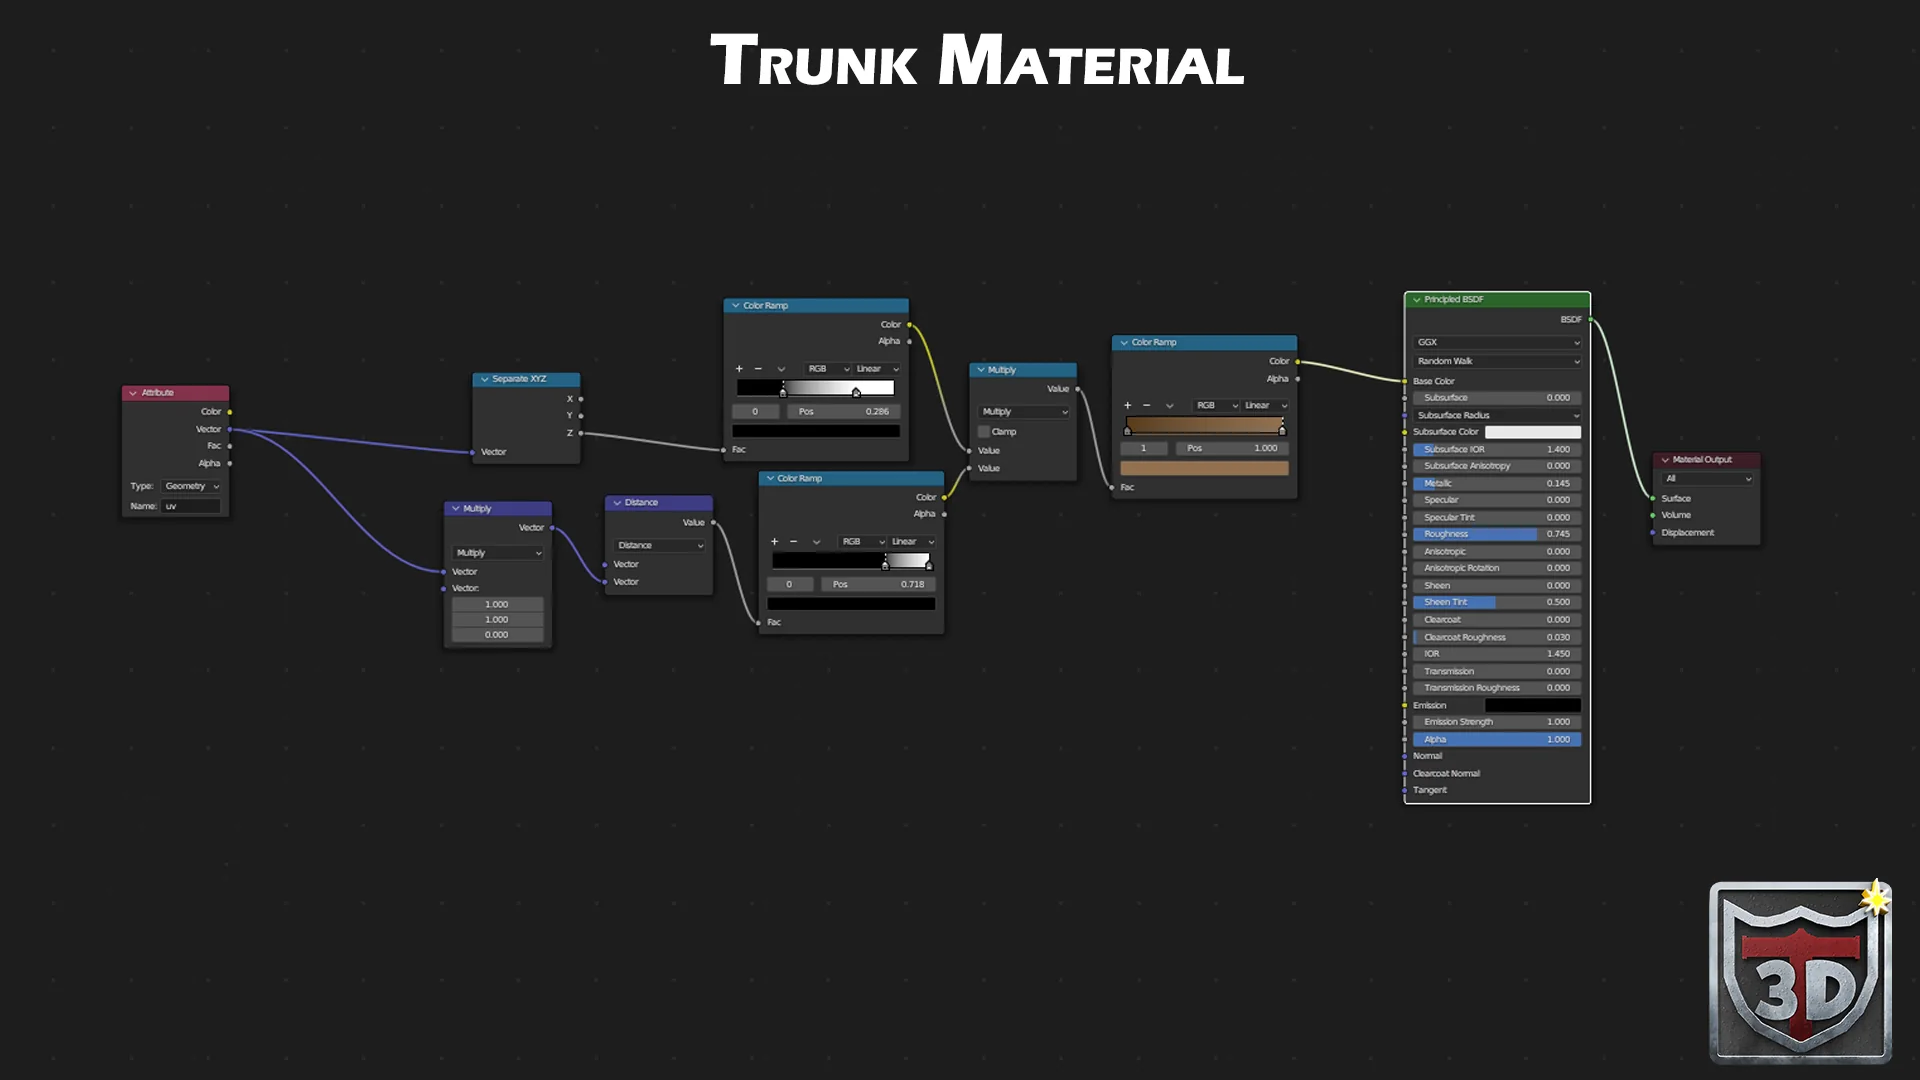
A Basic Geometry Nodes Palm Tree System
You do not need the entire advanced graph in your head before the method becomes useful. A starter palm system is readable if it answers a few questions in order: where is the trunk path, what builds the trunk, how are leaves placed, what is randomized, which materials are assigned, and what final geometry is returned.
Basic node logic:
- 1Start from a curve object so the palm trunk can be drawn, bent, copied, and revised without rebuilding every segment by hand.
- 2Resample and read the curve so the system can place trunk pieces and leaf logic along a predictable path.
- 3Build or instance the trunk from a repeatable TreeBit-style segment, then align those instances to the curve direction.
- 4Create the leaf crown from curve and point logic, then vary count, radius, angle, Z offset, and random offset through exposed inputs.
- 5Assign separate leaf and trunk materials before joining the geometry into one clean palm output.
- 6Keep the palm procedural while designing, then convert or apply only when the tree needs painting, baking, export, or fixed mesh cleanup.
Use the curve as the palm spine
The product file proves the active object is a curve named Palm Tree with a Geometry Nodes modifier. That curve is the edit handle for trunk bend and overall silhouette.
Separate trunk decisions from leaf decisions
A palm tree is easier to control when trunk size, trunk scale variation, leaf count, leaf radius, Z offset, and materials do not all live as one tangled decision.
Build a repeatable trunk source
The TreeBit helper is a small group used by the wider Palm Tree graph. Its role is to give the system a reusable trunk segment instead of forcing every ring to be modeled manually.
Scatter the crown with controlled randomness
The leaf area uses seed, count, random angle, random radius, and random Z offset style controls so one setup can create multiple believable crowns.
Keep materials as part of the system
The inspected setup has separate leaf and trunk material paths, so the article can talk about material handoff without pretending the whole tree is one shader.
Output one editable palm
The final graph joins the generated parts into one palm result while preserving the procedural controls until the artist decides the mesh should be fixed.
Introduction to the Advanced Node Layout
The basic layout explains the decisions. The advanced layout shows how those decisions become the larger Palm Tree production group: curve input, trunk helper geometry, leaf curves, randomness frames, material handoff, and final joined output. This is where the guide uses the real node capture, so the reader can study the actual system without being asked to memorize every socket.
Exposed controls / artist-facing setup
What to Expose and Why
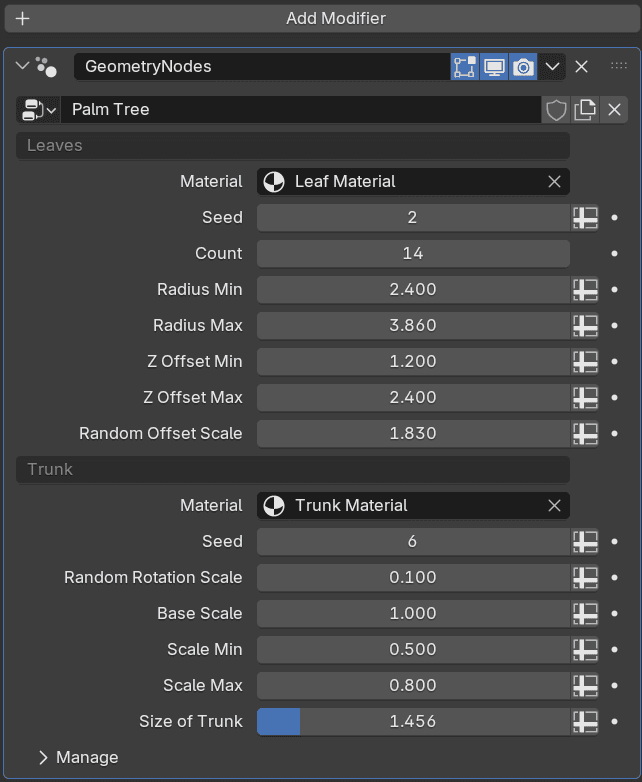
The inspected 3D Tudor Palm Tree source shows 15 visible artist-facing controls in the Blender Geometry Nodes modifier. The useful lesson is not memorizing every socket; it is knowing which controls an artist actually needs to shape the crown, vary the trunk, swap materials, and create new palms while building a scene.
01What it means
Exposing a control means taking a useful palm-tree decision from inside the Geometry Nodes graph and showing it on the Blender modifier panel as a slider, number field, or material slot.
02Why it matters
The artist can change leaf count, crown radius, vertical offset, trunk scale, random rotation, material slots, and seeds without opening the full node tree every time a scene needs a new palm.
03Good rule
Expose the decisions that shape the tree silhouette or material handoff repeatedly. Keep helper frames, internal math, and one-off wiring hidden unless they make the palm easier to use.
Leaf material and seed
Customer controls: Leaf Material, Leaf Seed
The material slot lets the fronds inherit the intended leaf shader, while the seed gives the artist a quick way to refresh the crown without rebuilding the leaf setup.
Leaf count and spread
Customer controls: Count, Radius Min, Radius Max
These controls decide how full the crown feels and how far the fronds reach away from the trunk. They are the first controls an artist changes when the palm needs to read sparse, young, dense, or stylized.
Crown height and offset
Customer controls: Z Offset Min, Z Offset Max, Random Offset Scale
Offset controls stop the leaf crown from looking like a flat ring. They let fronds sit at different heights so the silhouette feels built around a real crown point.
Trunk material and seed
Customer controls: Trunk Material, Trunk Seed
The trunk material stays separate from the leaf material, and the trunk seed gives the repeated bark pieces a fast variation route when several palms appear in one scene.
Trunk variation and scale
Customer controls: Random Rotation Scale, Base Scale, Scale Min, Scale Max
These controls keep the repeated trunk pieces from feeling mechanically copied. The artist can preserve the curve-driven palm shape while changing ring scale and rotation variation.
Trunk silhouette size
Customer controls: Size of Trunk
The trunk-size control changes the read of the whole tree: a thinner decorative palm, a chunkier stylized island tree, or a stronger foreground silhouette.
Snake path / practical build order
The Order an Artist Should Build In
Each box answers the practical question: what should I add now, what node families should I think about, what does it connect toward, and what mistake should I avoid before the palm setup becomes hard to fix?
Curve first
Start with the editable palm spine so the trunk silhouette can change before detail is added.
Trunk second
Build the repeatable trunk segment and curve alignment before scattering leaves.
Crown third
Add leaf count, radius, Z offset, and seed after the palm reads as a tree.
Output last
Assign materials, join the geometry, and test exposed controls only when the shape is stable.

01
Curve setup
Use the curve as the palm spine
Adds: One editable curve object that defines the trunk bend and the final palm silhouette.
- Node families:
- Group Input, curve input, curve sampling, position reading, transform helpers.
- Connects toward:
- A spine that later drives trunk placement, leaf crown position, and final output.
- Watch out:
- Starting with leaf decoration before the trunk curve reads correctly.
- Why:
- The curve is the artist handle. If it stays editable, the palm can change shape without rebuilding the tree.

02
Trunk source
Build the repeatable trunk segment
Adds: A reusable trunk-bit source that can be instanced along the curve instead of hand-stacked.
- Node families:
- TreeBit helper, mesh/curve primitives, transform geometry, set position.
- Connects toward:
- Clean source geometry for every ring or trunk piece used by the main Palm Tree group.
- Watch out:
- Making the helper too specific. It should serve the full trunk, not one fixed pose.
- Why:
- A good source segment keeps the main graph easier to read and easier to vary.

03
Curve reading
Sample the trunk path
Adds: Sample points, tangents, and curve positions so repeated trunk pieces know where to go.
- Node families:
- Resample Curve, Sample Curve, Align Euler to Vector, Position, Index.
- Connects toward:
- A reliable placement path for the trunk sequence and crown alignment.
- Watch out:
- Sampling too coarsely or changing count before the curve direction is clear.
- Why:
- The trunk needs a predictable path before scale, rotation, and variation make sense.

04
Trunk placement
Instance trunk pieces along the curve
Adds: Repeated trunk geometry that follows the curve instead of a manually duplicated stack.
- Node families:
- Instance on Points, Rotate Instances, Scale Instances, Realize Instances.
- Connects toward:
- A full trunk that still responds to the curve and artist-facing scale controls.
- Watch out:
- Realizing or applying too early. Keep the procedural trunk editable while testing.
- Why:
- This is the turn from one trunk segment to a reusable palm generator.

05
Trunk variation
Add scale and rotation controls
Adds: Random rotation scale, base scale, scale min/max, seed, and trunk-size controls.
- Node families:
- Random Value, Scale Instances, Rotate Instances, Math clamps, Group Input controls.
- Connects toward:
- A trunk that keeps the same curve but can feel thicker, thinner, cleaner, or more stylized.
- Watch out:
- Randomness that breaks the silhouette or makes repeated bark pieces look unstable.
- Why:
- Controlled variation helps several palms look related without becoming identical copies.
06
Leaf source
Prepare the leaf/frond logic
Adds: The leaf curve or frond source before it is scattered into a full crown.
- Node families:
- Curve logic, points, transforms, leaf geometry path, material handoff.
- Connects toward:
- A usable frond shape that can later be counted, rotated, offset, and material-assigned.
- Watch out:
- Trying to solve crown randomness before one clear leaf shape works.
- Why:
- The crown can only look good if the repeated leaf unit already reads well.

07
Crown placement
Scatter leaves around the top
Adds: Leaf count, crown radius, and placement logic around the top of the trunk.
- Node families:
- Points, Index, Random Value, Rotate Instances, Instance on Points.
- Connects toward:
- A readable palm crown that can be denser, wider, or more sparse through exposed controls.
- Watch out:
- A flat wheel of leaves. Crown placement needs height and radius variation.
- Why:
- Leaf placement is the first thing viewers read after the trunk silhouette.

08
Crown variation
Offset leaves in height and radius
Adds: Radius min/max, Z offset min/max, random offset scale, and leaf seed behavior.
- Node families:
- Random Value, Combine XYZ, Set Position, Map Range, Group Input controls.
- Connects toward:
- Leaf placement that can change without opening the full node graph.
- Watch out:
- Offsets that scatter leaves away from the crown instead of adding natural variation.
- Why:
- Small vertical and radial changes stop the crown from reading like a perfect ring.

09
Leaf material
Assign and protect the leaf shader
Adds: A separate leaf material slot so frond color and mask work stay editable.
- Node families:
- Set Material, material input, shader/material handoff, leaf branch routing.
- Connects toward:
- Fronds that can use the intended leaf material while the trunk stays separate.
- Watch out:
- Mixing leaf and trunk materials into one control path too early.
- Why:
- Separate material control keeps the generator useful across stylized and tropical scenes.

10
Trunk material
Assign trunk material separately
Adds: The trunk material slot and trunk branch material assignment before final joining.
- Node families:
- Set Material, material input, trunk branch routing, color/shader handoff.
- Connects toward:
- A trunk that can change bark feel without disturbing the leaves.
- Watch out:
- Hard-coding material choices into internal helper nodes where artists cannot reach them.
- Why:
- Material slots are artist controls, not decoration. They make the palm reusable.

11
Join output
Join trunk and leaves into one palm
Adds: The final joined geometry path after trunk, leaves, variation, and materials behave.
- Node families:
- Join Geometry, Realize Instances, Set Material, Group Output.
- Connects toward:
- One editable palm result that can still be adjusted through the modifier panel.
- Watch out:
- Joining branches before testing each part on its own.
- Why:
- The final tree should feel like one asset without hiding the controls that made it.

12
Control test
Test the exposed controls like an artist
Adds: Change leaf count, radius, offsets, trunk scale, seeds, materials, and trunk size in the modifier.
- Node families:
- Group Input controls, modifier interface, final output check, seed variation.
- Connects toward:
- A production-ready palm workflow where useful changes happen from the modifier panel.
- Watch out:
- Publishing controls that sound useful but do not change the tree clearly.
- Why:
- The tool succeeds when an artist can make a new palm without studying every internal node.
Use the Roadmap as a Build Checklist
Build one stage, test it, then move on. If a later stage breaks, step back to the previous card and make that part predictable before adding more controls.
Check as you go
Change the curve bend, leaf count, crown radius, trunk size, materials, and seeds while the generator is still editable.
Realistic or stylized palms
Where Palm Trees Fit
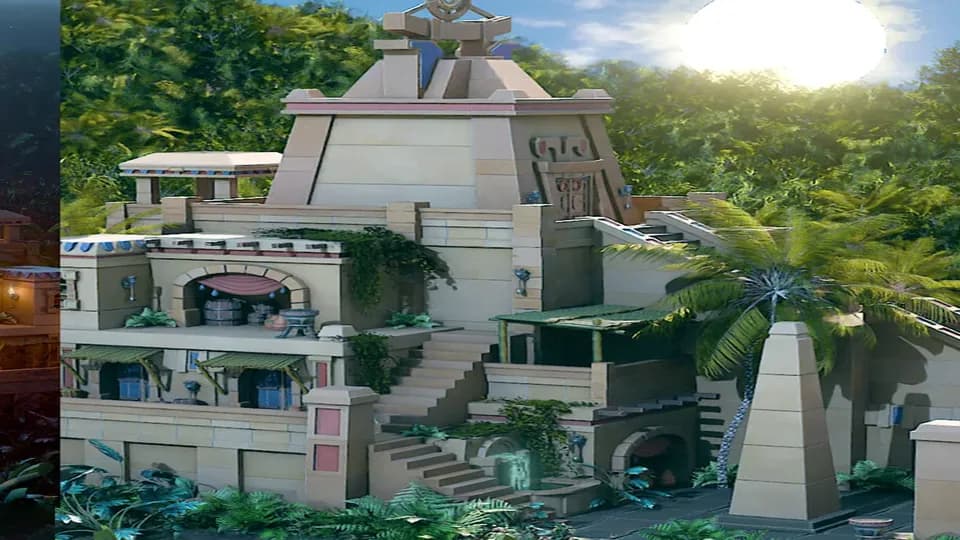
Palm trees are scene-dressing tools as much as standalone assets. Use them to frame desert buildings, break up coastal silhouettes, push jungle scale, or add oasis life to modular environments without hand-modelling every new tree.
 Open larger
 Open larger
 Open larger
 Open larger
Ready-made palm tree workflow
When You Need the Palm System Ready Today
Use the guide to understand the method. Use the 3D Tudor Palm Tree Geometry Node when you want the trunk curve, leaf crown, variation controls, material slots, and exposed seeds ready to adjust from the Blender modifier panel.
Draw or adjust the trunk curve instead of rebuilding a new palm from separate pieces.
Change leaf count, crown radius, Z offsets, seed values, trunk scale, and material slots from exposed controls.
Create several tropical, stylized, or game-ready palm variations from one working setup.
Artists use 3D Tudor Geometry Nodes to move faster
Related feedback from the Roof Tile Geometry Node
The Palm Tree node has its own 5-star marketplace rating signals. These written notes are related 3D Tudor Geometry Nodes feedback from the Roof Tile Geometry Node, not Palm-specific reviews.
very nice~ thx
T
Tree TreeRoof Tile Geometry Node feedbackRelated 3D Tudor Geometry Nodes feedback
Very nice work...Thank You.
T
TerenceRoof Tile Geometry Node feedbackRelated 3D Tudor Geometry Nodes feedback
thanks
J
JiangRoof Tile Geometry Node feedbackRelated 3D Tudor Geometry Nodes feedback
Exactly what I was looking for and it worked perfectly for my needs.
R
RobertRoof Tile Geometry Node reviewRelated 3D Tudor Geometry Nodes feedback
Questions artists are asking
Palm Tree Problems, Answered in One Place
Palm tree searches tend to circle the same decisions: beginner shape, low-poly versus realistic detail, leaf placement, Geometry Nodes controls, scene placement, game-engine export, and how to make several palms without hand-building each one again.
First palm build
Beginner shape choices, trunk curves, leaf planes, crown placement, and when a simple manual palm is enough.
Procedural controls
Geometry Nodes, exposed leaf and trunk controls, seeds, variation, scale, and reusable palm generation.
Scene style
Low-poly, stylized, realistic, tropical, desert oasis, architectural, and hero-scene palm decisions.
Export and speed
Viewport performance, game-engine export, UVs, materials, polygon budgets, and animation-ready choices.
Palm tree question bank
More Palm Tree Questions, Answered Clearly
1-1 / 40
Final palm-tree move
Build the Palm, Share the Scene, Keep the System Editable
The point is not just a nicer palm render. The win is a palm workflow you can adjust, explain, reuse, and show inside a real scene. Build one palm, turn the repeated decisions into controls, then use the result to help the next artist find the method.
Use manual modelling if
You are learning the shape, building one controlled prop, or deliberately hand-placing every trunk segment and frond.
Use Geometry Nodes if
You need editable trunks, repeated variations, exposed controls, randomized crowns, material slots, or several palms in one scene.
Use the 3D Tudor node if
You want the production controls already exposed, tested, and ready to adjust from the Blender modifier panel.
01
Build one palm by hand
Use the manual pass to understand trunk rhythm, crown placement, and leaf silhouette before the generator hides the repetition.
02Turn it into controls
Move the repeated choices into Geometry Nodes so count, radius, offsets, scale, materials, and seeds stay editable.
03Share the finished scene
Post the palm with one useful note, or bring it into Discord if you want feedback on silhouette, materials, or export cleanup.
Keep building with 3D Tudor