Written by Neil I. Bettison, founder of 3D Tudor, Packt-published Blender author, and creator of Blender courses, Geometry Nodes tools, asset packs, and Blender-to-Unreal workflows.
Back to Deep Dives
by 3D Tudor
How to Create Roof Tiles in Blender
A practical 3D Tudor guide to manual roof tile modelling, Array modifier rows, and procedural Geometry Nodes setups with editable spacing, offset, thickness, bend, randomization, and material variation.
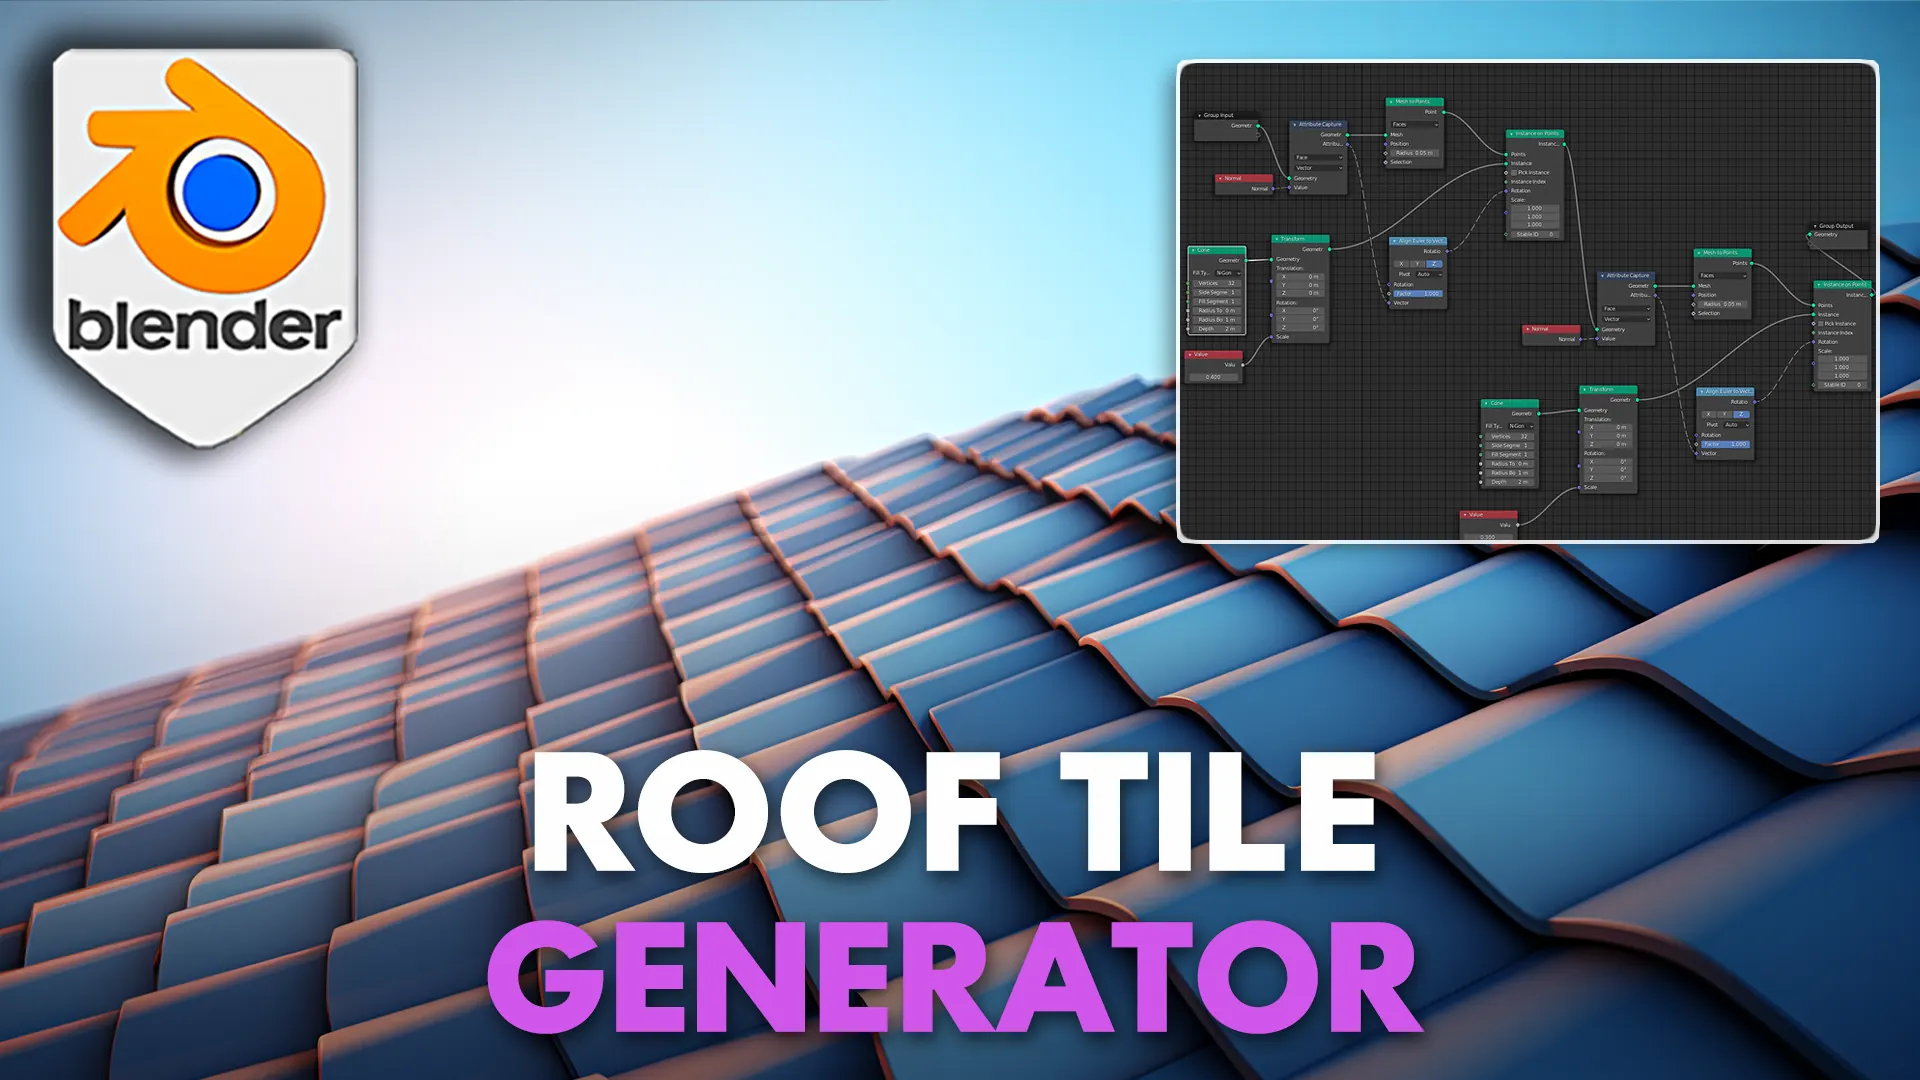
Quick answer: To create roof tiles in Blender, model one solid tile with thickness and a readable front edge, repeat it into rows, offset alternate rows, then add small variation to shape, color, and placement. Manual modelling works for a single small roof, Array modifiers work for simple repeated rows, and Geometry Nodes is the best scalable workflow when you need editable count, gaps, overlap, bend, material variation, and random seed controls.
Guide Details
This guide is written for Blender artists who need roof tiles that hold up in actual environments, not just in a marketplace thumbnail.
The 3D Tudor Roof Tile Geometry Node V1.2.1 working Blender file was checked directly, including the modifier controls, node setup, and demo roof examples.
What People Actually Need
Most searches around Blender roof tiles are not asking for a single fancy render. They are asking how to stop shingles looking flat, how to cover curved roofs, how to keep rows even, how to randomize without chaos, and when geometry is worth it instead of a normal map.
Manual modelling
Best for learning the tile shape or finishing one small roof where every tile can be placed and checked by hand.
Array modifiers
Best for straight rows of repeated tiles when you want quick duplication, simple offsets, and a mesh workflow.
Geometry Nodes
Best for reusable roof systems where count, spacing, row offset, bend, material variation, and random seed need to stay editable.
Normal or displacement maps
Best for distant roofs, game optimization, or background buildings where full tile geometry is not worth the extra weight.
Old way / manual tile builds
Build Roof Tiles by Hand First
These two short manual builds show the idea before any procedural system is added: make one readable tile, give it thickness, then repeat it with Array modifiers. Use the video controls for fullscreen, or open each clip larger without leaving the article.
Straight tile method
Straight Roof Tiles
Build one curved straight tile from a circle profile, then use Solidify and Array modifiers to repeat it into rows.
Open largerStylized tile method
Stylized Roof Tiles
Start from a simple plane, bevel the silhouette, add thickness, then stack Array modifiers to create a stylized roof rhythm.
Open largerStraight Tiles Step Guide
- 1Press A to select everything, then press X and confirm delete.
- 2Press Shift + A, then choose Mesh > Circle.
- 3Press R, Y, then type 90 to rotate the circle upright.
- 4Press Tab for Edit Mode, select the bottom half vertices, then press X to delete them.
- 5Select the farthest vertex on the Y+ axis, press E, Y, and drag to extrude along Y+.
- 6Select all vertices, then press E, X, and drag to extrude along the X- axis.
- 7Scale the freshly extruded vertices down slightly with S.
- 8Select the two farthest Y+ vertices opposite each other on X, press S, Y, 0 to align them, then move them with G, Y.
- 9Select the vertices you scaled down, press G, Z, B, pick the lowest scaled vertex, drag to the lowest unselected vertex, then left click to confirm.
- 10Press Tab to leave Edit Mode, then right click and choose Shade Auto Smooth.
- 11Add a Solidify modifier with Thickness 0.1, Offset 1, and Even Thickness checked.
- 12Add an Array modifier, set Count as needed, and use the modifier gizmo to move the tiles along Y.
- 13Add a second Array modifier, set Count as needed, and use the modifier gizmo to move the tiles along X and Z.
Stylized Tiles Step Guide
- 1Press A, then X, to delete the default cube.
- 2Press Shift + A, then choose Mesh > Plane.
- 3Press Tab, select two vertices, then press Ctrl + Shift + B to bevel the vertices. Use the mouse wheel to add definition, then confirm.
- 4Add a Solidify modifier with Thickness 0.1 and Offset 1.
- 5Add an Array modifier, set Count as needed, and use the modifier gizmo to move the tiles along Y.
- 6Add a second Array modifier with Count 2, then use the modifier gizmo to move tiles along Y, X, and Z.
- 7Add a third Array modifier, set Count as needed, and use the modifier gizmo to move the full roof rows along X and Z.
Workflow proof / manual or procedural
Manual vs Procedural Roof Tiles: A Simple Test
If you are deciding whether to build roof tiles by hand or use Geometry Nodes, test the workflow on one small roof before committing to a full environment. Do not only test the first setup; test what happens when the art direction changes.
1
Initial setup
Manual tiles
Fast enough for one small roof if the tile shape is simple.
Geometry Nodes setup
Needs setup time, but the controls become reusable.
2
Changing roof width
Manual tiles
Often means moving rows, fixing gaps, and checking intersections.
Geometry Nodes setup
Adjust count, width, spacing, or gaps from exposed controls.
3
Material variation
Manual tiles
Requires manual selection, duplicated materials, or separate passes.
Geometry Nodes setup
Odd/even material slots and randomization keep variation editable.
4
Curved or fantasy roof
Manual tiles
Usually needs bend, shrinkwrap, proportional edits, and cleanup.
Geometry Nodes setup
Bend, compression, and roof-angle controls keep the tile field adjustable.
5
Export or final cleanup
Manual tiles
Already mesh, but revisions are expensive.
Geometry Nodes setup
Keep procedural while designing; apply or realize geometry when the design is settled.
| Test | Manual tiles | Geometry Nodes setup |
|---|---|---|
| Initial setup | Fast enough for one small roof if the tile shape is simple. | Needs setup time, but the controls become reusable. |
| Changing roof width | Often means moving rows, fixing gaps, and checking intersections. | Adjust count, width, spacing, or gaps from exposed controls. |
| Material variation | Requires manual selection, duplicated materials, or separate passes. | Odd/even material slots and randomization keep variation editable. |
| Curved or fantasy roof | Usually needs bend, shrinkwrap, proportional edits, and cleanup. | Bend, compression, and roof-angle controls keep the tile field adjustable. |
| Export or final cleanup | Already mesh, but revisions are expensive. | Keep procedural while designing; apply or realize geometry when the design is settled. |
For a final benchmark: record setup time, change time, and export cleanup on the same roof using both methods. Measured results make the article stronger than generic workflow claims.
Basic nodes / procedural start
Introduction to Basic and Advanced Geometry Node Set Up
Once one tile works by hand, the next job is to turn that repeated roof pattern into an editable system. This section shows that move in three passes, so the node setup feels like a build path instead of a finished graph you have to memorize.
01GIF result
Watch the roof change first. The aim is repeatable tiles that can be adjusted after the pattern is built, not a fixed row of duplicated meshes.
02Basic layout
Then break the system into decisions: roof surface, rows, columns, tile instancing, offsets, overlap, and small safe variation.
03Advanced capture
Finally use the node viewer as a map for the larger production graph: tile shape, rows, randomization, gaps, bend, materials, and output cleanup.
A Basic Geometry Nodes Roof Tile System
You do not need to understand every node at once to learn the method. A useful starter node system is simple: take a roof surface, create a row-and-column layout, instance a tile, offset alternate rows, randomize small values, then output generated geometry.
Basic node logic:
- 1Use the roof plane as the input surface.
- 2Read the roof width and height or define a clean working area.
- 3Generate rows and columns that can be changed independently.
- 4Instance one tile mesh onto the generated points.
- 5Offset alternate rows so the roof does not look like a grid.
- 6Add overlap and spacing controls before decorative detail.
- 7Randomize size, material, and shape within safe limits.
- 8Keep the result procedural while designing, then apply or convert only when exporting or finalizing.
Use the roof plane as the input
The roof surface decides where the generated tile field lives. This keeps the system tied to the actual building instead of floating as loose duplicated pieces.
Create the tile grid
Build a controlled grid or row distribution that separates vertical count from horizontal count. This is where you prevent stretched rows, uneven coverage, and accidental gaps.
Instance the tile shape
Instance one clean tile mesh onto the generated points, then give it thickness and a readable bottom shape before adding variation.
Offset, overlap, and randomize
Offset odd and even rows, add controlled gaps, vary width or length slightly, and change material or color subtly so the roof looks handmade without breaking the pattern.
Add bend or compression for roof shape
Curved towers, fantasy roofs, and stylized buildings need roof-angle and bend controls so the tiles belong to the building form rather than sitting on a flat plane.
Introduction to the Advanced Node Layout
The basic layout explains the pattern. The capture below shows how that idea becomes a larger artist-facing system: tile-shape controls, row generation, controlled randomness, gap and overlap helpers, bend/compression logic, material handling, and the final output stage. Use it as a map of the system, not as a demand to memorize every socket.
Exposed controls / artist-facing setup
What to Expose and Why
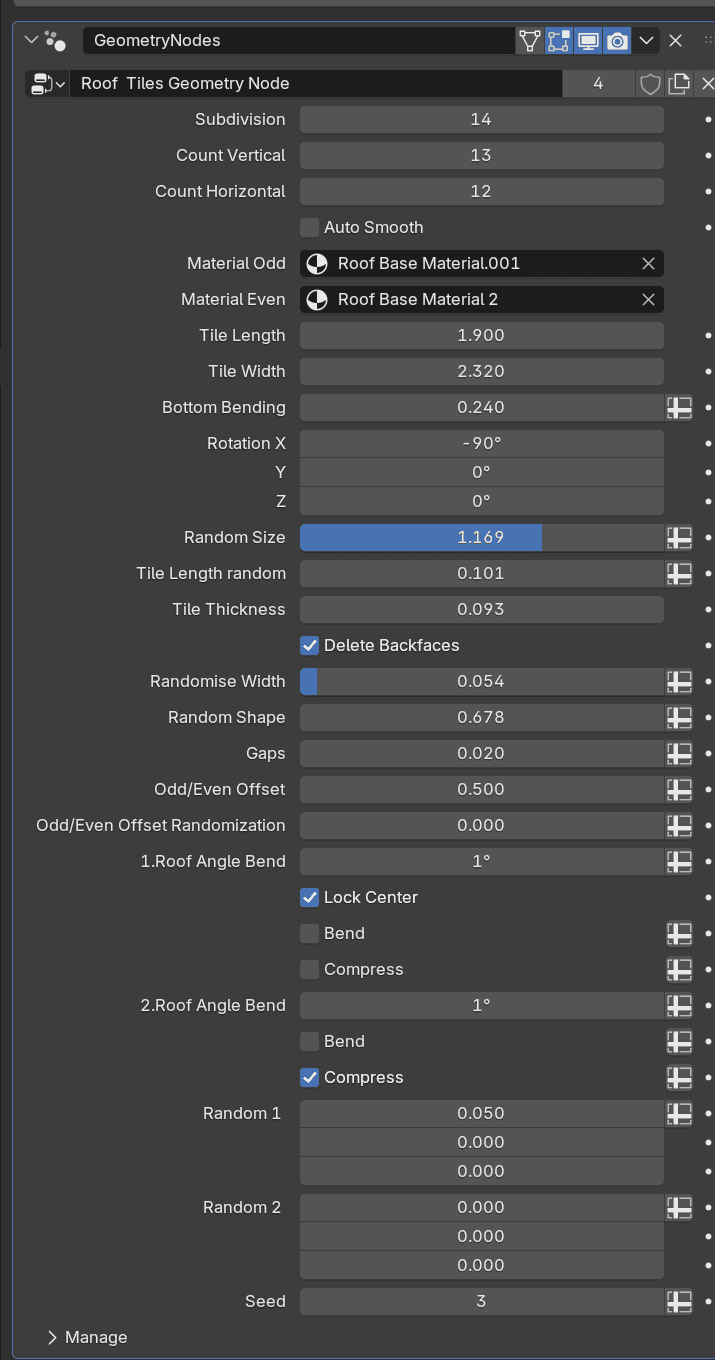
The inspected 3D Tudor roof tile source uses a customer-facing Geometry Nodes modifier with 29 exposed controls. The useful lesson is not seeing every node at once; it is knowing which controls an artist actually needs to shape, fill, randomize, bend, clean, and recolour the roof while building.
01What it means
Exposing a control means taking a useful value from inside the Geometry Nodes graph and showing it on the Blender modifier panel as a slider, toggle, vector, or material slot.
02Why it matters
The artist can reshape the roof, change row density, adjust gaps, swap materials, or refresh the random pattern without opening the node tree and rebuilding the system.
03Good rule
Expose decisions an artist will adjust repeatedly. Keep helper math, cleanup wiring, and one-off internal fixes hidden unless they make the tool easier to use.
Coverage and spacing
Customer controls: Count Vertical, Count Horizontal, Gaps
These controls decide how many tiles fill the roof and how much air sits between rows. They are the first controls a customer needs when a roof gets wider, taller, tighter, or more stylized.
Tile form
Customer controls: Tile Length, Tile Width, Tile Thickness, Subdivision, Bottom Bending
These shape the repeated tile itself. Length and width set the rhythm, thickness gives real shadow, subdivision controls smoothness, and bottom bending helps the tile read as clay, slate, fantasy, or flatter shingles.
Row rhythm
Customer controls: Odd/Even Offset, Odd/Even Offset Randomization, Rotation
A roof starts looking tiled when alternate rows shift instead of forming a square grid. Offset controls create the stagger; rotation helps the tile field sit correctly on the roof angle.
Controlled variation
Customer controls: Random Size, Tile Length Random, Randomise Width, Random Shape, Seed
Variation should add life without wrecking the silhouette. These controls let a customer change the handmade feel, then use Seed to quickly try a different pattern while keeping the design intact.
Material control
Customer controls: Material Odd, Material Even
Material slots let the roof alternate colour, roughness, or surface feel across rows without hand-selecting hundreds of individual tiles.
Roof fit and cleanup
Customer controls: Roof Angle Bend, Bend, Compress, Lock Center, Delete Backfaces, Auto Smooth
These controls help the system belong to the building: bending or compressing for towers and sloped faces, locking the center so the form behaves, and cleaning hidden faces or shading problems before export.
Snake path / practical build order
The Order an Artist Should Build In
Each box answers the practical question: what should I add now, what node families should I think about, what does it connect toward, and what mistake should I avoid before the system becomes hard to fix?
Geometry first
Start with roof surface, bounds, rows, and tile mesh logic.
Control second
Expose count, size, offset, gaps, randomization, and materials only when they help an artist.
Shape third
Use bend, compression, rotation, and smoothing after the tile field behaves.
Output last
Realize, clean, material split, and export only after the roof design is stable.
01
Surface setup
Feed in the roof surface and define bounds
Adds: One clean roof plane or selected roof surface that becomes the area the tile system must cover.
- Node families:
- Group Input, Bounding Box, Position, Separate XYZ, Math, Map Range.
- Connects toward:
- Normalized width and height values that later drive rows, columns, and safe limits.
- Watch out:
- Un-applied transforms and unclear roof scale will make counts and gaps feel wrong later.
- Why:
- Every later tile decision needs a reliable surface to build from.
02
Row logic
Create vertical rows and horizontal columns
Adds: Separate controls for vertical count and horizontal count before beauty detail.
- Node families:
- Mesh Line, Index, Count controls, Math division/multiply, Combine XYZ.
- Connects toward:
- A clean point or guide-row structure where every tile knows its row and column.
- Watch out:
- Stretching one axis to fit the roof. Counts should change the pattern, not squash tiles.
- Why:
- A roof tile generator succeeds or fails on row rhythm before material polish.
03
Tile shape
Build the base tile silhouette once
Adds: The single tile form first: length, width, bottom bend, and the silhouette that will repeat.
- Node families:
- Curve/RGB style shaping, Set Position, Mesh Line, Vector Math, Transform Geometry.
- Connects toward:
- One reusable tile instance that can be scaled, offset, rotated, and thickened.
- Watch out:
- Adding random detail before the tile form reads well in plain lighting.
- Why:
- A weak base tile becomes weak thousands of times when it is instanced across the roof.
04
Physical detail
Add thickness and optional backface cleanup
Adds: Real thickness, bottom shape, shade smoothing, and a cleanup choice for unwanted backs.
- Node families:
- Extrude Mesh, Set Position, Set Shade Smooth, Flip Faces, Delete Geometry, Switch.
- Connects toward:
- A tile mesh that catches light properly and survives close camera views.
- Watch out:
- Paper-thin tiles. They look fast, but the roof loses silhouettes and shadow breaks.
- Why:
- Geometry thickness is what separates a real tile system from only a roof texture.
05
Instance field
Instance the tile onto generated points
Adds: Points or row guide geometry, then place your reusable tile instance onto those positions.
- Node families:
- Instance on Points, Points, Sample Index, Capture Attribute, Realize Instances.
- Connects toward:
- A full tile field that is still editable through counts and dimensions.
- Watch out:
- Realizing too early. Keep instances alive while the roof design is changing.
- Why:
- This is the turn from one tile to a procedural roof system.
06
Brick rhythm
Offset odd and even rows
Adds: An odd/even row offset so the roof does not look like a square grid of repeated stamps.
- Node families:
- Index, Compare, Modulo-style Math, Randomize helper, Set Position.
- Connects toward:
- A believable stagger pattern with artist-facing offset controls.
- Watch out:
- Offsets that push edge tiles outside the roof or create half-tile holes on borders.
- Why:
- Row offset is one of the fastest ways to make procedural tiles stop looking procedural.
07
Controlled variation
Randomize offsets without breaking the rows
Adds: Small position variation with seed control, then clamp it so the roof stays readable.
- Node families:
- Random Value, ID/Index, Capture Attribute, Set Position, Math, Combine XYZ.
- Connects toward:
- Varied roof lines that still preserve consistent overlap and row direction.
- Watch out:
- Using randomness as decoration. Variation should support the roof, not scatter it.
- Why:
- This is where a clean generator starts feeling handmade without becoming messy.
08
Tile scale
Drive length, width, and shape variation
Adds: Tile length, tile width, random size, random width, and shape variation after rows work.
- Node families:
- Transform Geometry, Vector Math, Edge Vertices, Randomize helper, Math clamps.
- Connects toward:
- Tiles that can fit realistic slate, chunky stylized forms, or fantasy roof shapes.
- Watch out:
- Variation that changes scale but forgets gaps, overlap, or rotation.
- Why:
- Scale controls let the same system serve different art directions without rebuilding.
09
Gap control
Manage tile gaps and edge-derived points
Adds: A gap control after row and scale behavior is working, then test close-ups and edges.
- Node families:
- Tile Gaps, Edges to Points, Sample Index, Domain Size, Points, Set Position.
- Connects toward:
- Readable overlaps with enough shadow between tiles and no accidental seams.
- Watch out:
- Gaps that look fine in one preset but collapse when count or width changes.
- Why:
- Gaps are tiny controls with huge visual impact, especially on close roof assets.
10
Roof direction
Add rotation and align the field to the roof
Adds: Rotation controls once the points and tiles are stable, then test multiple camera angles.
- Node families:
- Euler to Rotation, Vector Math, Transform Geometry, Group Input rotation vector.
- Connects toward:
- Tiles that sit with the roof direction instead of fighting the building silhouette.
- Watch out:
- Rotating the tile mesh and the placement field in different spaces by accident.
- Why:
- Roof direction determines whether generated rows feel attached to architecture.
11
Roof shaping
Use bend and compression after the flat system works
Adds: Bend angle, lock-center, bend/compress toggles, and axis logic after the flat roof is predictable.
- Node families:
- Bend helper, Origin helper, Position, Attribute Statistic, Compare, Vector Rotate.
- Connects toward:
- Curved towers, stylized roofs, and fantasy forms without manually placing every tile.
- Watch out:
- Bending before the flat pattern is correct. It hides simple errors inside complex shape changes.
- Why:
- Bend and compression turn a flat generator into a roof-form tool.
12
Finish output
Smooth, split materials, and output clean geometry
Adds: Material odd/even choices, auto smoothing, merge/realize cleanup, and a final output path.
- Node families:
- Smooth by Angle, Separate Geometry, Set Material, Join Geometry, Merge by Distance, Group Output.
- Connects toward:
- Usable roof geometry for Blender scenes and later export or bake decisions.
- Watch out:
- Applying or converting before the design is approved. Keep the generator editable as long as possible.
- Why:
- A procedural tool is only useful if the final result is clean enough for production decisions.
Use the Roadmap as a Build Checklist
Build one stage, test it, then move on. If a later stage breaks, step back to the previous card and make that part predictable before adding more controls.
Check as you go
Change the roof width, test close-up thickness, try realistic and stylized materials, and keep the generator editable until the design direction is settled.
Realistic or stylized tiles
Realistic or Stylized Roof Tiles
The same roof logic can support believable architectural tiles, dark slate-style city roofs, and stylized fantasy roofs. The difference is the tile silhouette, material choice, edge softness, and how much variation you allow.
 Open larger
 Open larger
 Open larger
 Open larger
Ready-made roof tile workflow
When You Do Not Have Time to Build the Full System
Use the guide to understand the method. Use the 3D Tudor Roof Tile Geometry Node when you want the roof to start working today: drop it onto a roof plane, adjust the exposed controls, and spend your time shaping the building instead of rebuilding tile rows.
Apply the roof tile Geometry Node to a roof plane instead of hand-placing rows.
Shape count, gaps, thickness, bend, compression, material slots, and seed from exposed controls.
Use the free showcase option to inspect the setup before choosing the full production version.
Artists use 3D Tudor tools to move faster
What others thought about the Roof Tile Geometry Node
Roof tile buyers on Gumroad and Superhive highlight the clean result, practical Blender workflow, and quick setup for custom roof designs.
“very nice~ thx”
T
Tree TreeGumroad buyer note
“Very nice work...Thank You.”
T
TerenceGumroad buyer note
“thanks”
J
JiangGumroad buyer note
“Exactly what I was looking for and it worked perfectly for my needs.”
R
RobertSuperhive buyer review
Questions artists are asking
Roof Tile Problems, Answered in One Place
Roof tiles create the same practical problems again and again: flat-looking shingles, awkward curves, messy overlaps, heavy geometry, export cleanup, and materials that feel too repeated. This section keeps those answers together so you can solve the roof in front of you.
Realistic roofs
Thickness, overlap, bevels, material breakup, shadow gaps, weathering, and close-camera silhouettes.
Procedural setup
Manual tiles, Array modifiers, Geometry Nodes, row counts, grid spacing, and reusable roof controls.
Shape and style
Curved roofs, domes, fantasy towers, stylized tiles, tile scale, and readable roof rhythm.
Export decisions
Performance, baking, normal maps, game assets, applied mesh cleanup, UVs, and file organization.
Roof tile question bank
More Roof Tile Questions, Answered Clearly
1-1 / 40
Final roof-tile move
Build the Roof, Share the Result, Keep the System Reusable
The point is not just a nicer roof texture. The win is a roof workflow you can adjust, explain, reuse, and show. Build one roof, turn the repetition into controls, then use the finished scene to help the next artist find the method faster.
Use manual modelling if
You are learning the shape, making one small prop, or need complete hand control over every tile.
Use Geometry Nodes if
You need editable rows, repeated variations, curved roofs, material variation, or multiple roofs from one setup.
Use the 3D Tudor node if
You want the production controls already exposed, tested, and ready to adjust from the Blender modifier panel.
01
Build one roof by hand
Use the manual pass to understand thickness, overlap, and row rhythm before the generator hides the repetition.
02Turn it into a system
Move the repeated roof into Geometry Nodes so count, gaps, offset, bend, variation, and seed stay editable.
03Share the finished scene
Post the roof with the guide link, or bring it into Discord if you want feedback on spacing, normals, or export cleanup.
Keep building with 3D Tudor